skip to main |
skip to sidebar
This weekend we tried a couple of things.
Here's the deal - I don't eat food I don't like. For instance, a half hour ago we made my very favorite chocolate pudding for lunch, only we used arugula rather than a milder tasting green, so let's just say that the flavor combination is NOT my favorite. Aware of all the nutrients that are in this funny tasting smoothie, I'm eating it, but very very slowly. Maybe it's been more like an hour.
The point of that was to say that this raw food change we've made would not be happening if we (read that to be I) didn't like what we were eating. It has to be delicious, or else I won't stick to it.
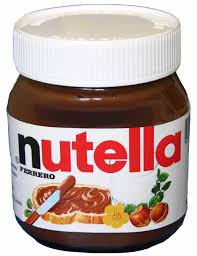
So, when we (I) have cravings for random food, I try to make it raw. And this weekend, I tried two things. The first:
I don't think I need to say anything more about WHY I wanted to figure this out, right?
So I thought about the ingredients: hazlenuts, oil, milk, chocolate, and a bunch of other stuff that's less important. Ok, I'll try it.
So I soaked some hazlenuts for one day, which turned out to be two days, to get them all soft and blendable.
(I also soaked cashews, which went a little fermented and I vetoed for the nutella, but I DID make a frigging amazing nacho cheese with - what do you think the milk does to make nacho cheese?)
And blended them up with store bought hazlenut milk, cacao, agave, a little stevia, and young coconut meat.
As far as nutella went, it was awful.
Really, it was very very bad. Horrible, in fact. The nuts didn't blend smoothly and it was chunky and not as rich as real nutella.
At the last moment before a trip to the trashcan, T and I noticed that the texture was very Wendy's Frosty-like.
So we put it in the freezer for awhile, and voila: DELICIOUS CHOCOLATE ICE CREAM/FROZEN YOGURT STUFF.
Score!
The second thing was the nacho cheese, which I've already discussed. I adapted this guy's recipe by using the fermented cashews instead of macadamia nuts, and I don't know how much lemon juice I added, if any, but it was out and out AWESOME in the end.
I've tried a cashew ricotta recipe that instructed you to leave the blended cheese mixture out at room temperature overnight, to make it ferment, and it ended up tasting JUST like ricotta, only more flavorful!
So score #2!
And finally, I tried the bread I mentioned a couple posts ago. Made with sun dried tomatoes, herbs, flax seeds and almonds, among other things. And it's dehydrated for an entire 10 hours, but lemme tell you it tastes just like bread!
Score #3.
We've made some staple recipes so far, and want to be finding at least one new delicious recipe each week.
I'm looking forward to living in Portland after the wedding and inviting friends to come stay with us, pig out on delicious albeit strange food, and go home healthier than before! Gonna be good times.
On another note, I'm going to start a gratitude list. It was mentioned today on one of my favorite blogs, which you can read here. It's written by an ex-teacher and current mentor of mine, who's one of the smartest and most compassionate people I know, and who has written two amazing books which you should immediately read - they'll make your life better. And they're short, which makes them all the more readable! Anyway, on the blog today he spoke of organ donors who cultivated a practice of spending 15 minutes a day writing a list of things they were grateful for. They recovered from the donations sooner AND with less complications. I'd be willing to bet that their internal happiness state elevated quite a bit too as a result.
And as I'm healthy already (haven't donated any organs recently), how much more beneficial would it be?
(the same goes for everyone reading this. And I do think it would also work if you divided it up into three 5 minutes sessions a day, so for those of you sitting at your desks at work reading this, DO IT three times a day. It's 5 minutes. And it'll make you happier and more productive, even at your job. Scribble on a piece of computer paper and keep it in your drawer. Totally doable).
So, I'll be posting it from time to time.
Happy Sunday!
Since it's been about five zillion years since I've done a recipe post, I figured that now was as good a time as any.
Besides, after the holidays there's always the potential to feel a little aimless. All the hustle and bustle and visits and presents and craziness (not to mention the WINE...let's not go there), just lead into a cold January, that's full of things to catch up on (usually work and/or school related), weight to lose (can I get an amen on THAT one), and planning and implementing to do (hello resolutions! I, by the way, have not done a full out formal meditation ONCE since the new year).
For that reason, today's recipe will be quick, cheap, and delicious.
Since I'll be going raw (foodist) in less than a month, someone may as well be able to enjoy a melted chocolate recipe once I can't any more.
But anywhoo, on to the Peppermint Bark. (by the way, this recipe is just from a conglomeration of ones I found by googling "peppermint bark recipe" - I didn't make it up, but it's not exactly copied either. FYI!)
 You'll need:
1 bag of chocolate chips (milk or dark, whichever you'd prefer)
1 bag of white chocolate chips
1 bottle of peppermint extract (do the natural one, it's oh so much better - kind of like vanilla, where imitation extract tastes totally different, not that it's bad. I recall dabbing it on my wrists and neck as a little girl when I wanted "perfume" - it was awesome. I still love the smell - when using it for perfume at 5 years old, go imitation! When using it for cooking, do real vanilla. Same for peppermint. Anyway)
---also, a little bottle may be more than you'd expect to pay - mine was $7 or so, but it will last you forEVER.
a few candy canes, or round peppermints, either one works just as well. a large handful will do.
What to do:
- Preheat your oven to 250 degrees F.
- line a cookie sheet with foil.
- spread out the chocolate chips (not the white ones, just the milk/dark) on the cookie sheet in a layer. Don't have them go all the way to the edges, and make sure the layer is definitely touching. I'd keep it about 2 chips deep.
- bake for 5 minutes (only 5!)
- when you remove the cookie sheet, the chocolate chips will still have their forms and won't look melty. However, once you grab a spatula or big spoon and gently smooth them into a layer, you'll see that they're actually just about softened into a liquid. By the way, that's the next step - to smooth them into a layer (as even as you can, doesn't have to be perfect)
- pop the cookie sheet into the fridge to chill for 20 minutes.
- while you're waiting, take your peppermints or candy canes and smash them up into small pieces. My particular method was to bribe a certain fiance to take them into the basement with a hammer and go to work. This would work. So would lots of other methods. Be creative! Take out some aggression!
- once the 20 minutes have passed, rig a double boiler by placing a metal bowl on the top of a saucepan. Make sure the bowl is large enough that at least half of it is out of the pan. Also, you don't want it to touch the bottom of the pan - you need at least two inches. Put about an inch to an inch and a half of water into the saucepan, and bring it to a soft boil (which means just small bubbles and a good amount of steam). Depending on your stove, this could be at anywhere from medium-low to medium-high heat.
- pour your white chocolate chips into the bowl atop the saucepan, and stir them until melted. It won't take too long if you start once the water is already gently boiling. note: if you have the water too hot, the white chocolate will clump rather than melting nicely. That's bad. If it happens, turn the heat down. Also, if it happens, it isn't the end of the world and your chocolate will still taste yummy, it'll just be harder to deal with.
- once the white chocolate chips are melting, take the cookie sheet out of the fridge. You want to not have that layer so cold that it forms a layer of condensation (it'll make the layers not stick well enough). So just sit it on the counter to wait until you're ready for the next thing.
- after the white chocolate is all melted, pour in 3 or 4 drops of peppermint extract. Really, that's ALL you need! Any more and you'll be waaaaaaaaay too pepperminty! A little goes a long way, trust me.
- stir until the peppermint is distributed throughout. You won't really be able to tell, so just stir the chocolate well and you're good.
By about now, it should be smelling delicious. If you like peppermint, that is. If not, I wouldn't recommend this recipe. Anyway.
- gently pour the melted white chocolate over the refrigerated milk/dark chocolate layer, spreading it out to cover as evenly as possible. Again, doesn't have to be perfect. Also, work fairly quickly here, because if you dilly dally like I did, the chocolate on the bottom will start to melt and mix, which still tastes fine, but isn't as pretty.
- once the white chocolate is spread out, sprinkle the smashed peppermint bits over the top until they've covered the white chocolate. If you want, you can press them down with your hand (if the layer is good you won't come away with white chocolate fingers) - even if you don't do this they'll probably stick just fine, so it's optional. I'm just a tad OCD so I did it. Anyway,
- refrigerate for at least an hour. After that long, use a knife to cut into small pieces (remember, you're eating straight chocolate so think how big a Hershey's bar pieces, once broken along their lines, are. Do them about 1.5 to 2 times as big as those pieces)
- Eat! Take small bites and savor! Also, peppermint settles your stomach so these are great for an after dinner snack!
I'd love to hear how this recipe goes if you try it out! Lemme know!
Today's quote:
The clock is a conspiracy and a crime against humanity and I would not own one except I miss appointments without it. ~Brian Andreas
I know it's after the holiday, but that's when I made these so...sorry. Try them this weekend. Chocolate covered strawberries are good for any occasion!
This is what you'll need:
- a medium sized pot for water
- a medium sized bowl
- some fresh strawberries
- a large (as in, really big, like 1-lb. If there aren't any that size available, get smaller ones. It doesn't really matter) of the kind of chocolate you want to use (dark, milk, etc)
- a cookie sheet covered with plastic wrap
Wash strawberries and dry (it's easiest to wash them a bit before you wanna do this and lay them out to air-dry. Also because they shouldn't be cold when you cover them w/ chocolate, or else they'll form condensation and get wet again anyway...)
Chop your chocolate into very small pieces (maybe 1/4 inch squares?). Fill the pan with enough water that there will be several inches, but that when the bowl is sitting on top it won't touch the water (you're basically making a double-boiler. If you have a real store-bought one, you can use that of course).
Turn the heat on under the water to about medium to medium-high. You want the water to be very softly boiling.
Arrange your work area so that the strawberries and cookie sheet with plastic wrap are both within reach.
Put chocolate shavings in the metal bowl, which you put on top of the pan with water. If the water's already hot, the chocolate will start to gently melt. Stir it here and there (if you don't stir it and/or if the water's too hot, the chocolate will singe a little and have tiny hard pieces in it; yucky).
When the chocolate is all melted, dip the strawberries in it. Hold by the green tops and swirl them in the melted chocolate til they're covered all the way up to the tops. Lie each strawberry on the plastic wrap.
You may have left over chocolate. If so, that's okay. Either dip other things too, or spread it thin somewhere to dry, and you can always chop it up the next morning and use it to cover your hot gluten-free pumpkin bread french toast (why, whatever else would you do with gluten-free pumpkin bread?). That's what I did.
Refrigerate your chocolate covered strawberries! Either that, or wait 800 hours for them to fully harden. But, once they're hard, they're delicious. Or, if you're like me and decide to begin once your guests are already there, still-wet chocolate covered strawberries are delicious too. Hardened chocolate is just a lot more awesome.
I hope everyone had wonderful V-Days! Mine was the best I've ever had. I'll post pics of that and of the party on Friday night tomorrow.
Happy Monday! And there aren't many things to discover on Friday afternoon at the office that are better than you have Monday off. Holiday? What? I love those kinds of surprises (yes, the ones that are only surprises because I'm so oblivious).
 I tried this recipe a couple of months ago, and it's definitely going in the cookbook. I got it from www.allrecipes.com, and tweaked it a bit to include stuff I like.
I'm going to record what I did here, but I'll record it the way I did it, which doesn't include things like measurements or firm ingredients. I'm just awesome (aka lazy) like that.
Here's the important stuff you need:
- a 3 pound chicken, thawed (that part's important, learned the hard way)
- a 450 degree preheated oven
- various veggies (I used carrots, potatoes, sweet potatoes which sound odd but were soooo delicious, onions, celery, that kind of stuff. Basically what's laying around and what sounds like it'd be good)
- some white wine (totally out of the glass I was drinking. Then I promptly refilled the glass. Priorities!)
- some veggie stock
- a bay leaf (worth investing in a bottle of these; you may not use them that often but they come in super handy_
- whatever spices are in the cupboard (I think I used oregano, sage, salt and pepper of course, a bit of paprika, maybe some garlic salt, I don't really remember. I just grabbed stuff. And some chopped rosemary from the dying plant in my kitchen window)
- about a handful of butter (yeah I said handful)
While the oven's preheating, rinse and pat dry the chicken.
Chop the veggies into roughly 1.5 inch cubes, I suppose. Something like that. Cut a bit of each thing small so it can be stuffed on the inside (the onions are most important here, along w/ some of the celery and carrots. Don't bother with the potatoes).
Melt the butter in the microwave.
Here's the gross and fun part - dump the spices into the butter so that they're mixed in there. Then, coat the chicken with the spiced butter. I guess you could use a brush or something, but I just kindergarten-style did it with my hands. Lots o' slippery fun. Wow, that sounded dirty.
ANYWAY.
Stuff the bird with the veggies you cut up small, some of the herbs (whatever you want, but things with a stronger flavor go better for this) and the bay leaf.
Lie the chicken FACE DOWN in a roasting dish. Surround it with the chopped veggies, and pour some wine and vegetable stock in until you have about an inch of liquid in the bottom. Cover.
Cook for 20 mins at 450 degrees.
Lower oven to 400 degrees, and cook for 40 minutes. When there's 10ish minutes to go, uncover and flip the chicken so the breast side is on top. This makes it get nicely browned, while cooking it face-down all that time will keep the breast meat juicy.
All done! On Martha Stewart's website, she has a tutorial on how to carve a turkey that's amazing, and that I use whenever I make any kind of bird.
The veggies are the side (of course), and the chicken'll be tender and delish. Also, it's super cheap! A 3-lb chicken is around $7, and a lot of the rest of the stuff is either cheap to buy, or already probably in your kitchen.
Give it a go, it's healthy, yummy, cheap and fast. All the things a good recipe should be.
Happy Thursday! Tonight I'm trying Salmon Fingers. Mmm.